
Introduction to Arduinos: Blinking LEDs
PROJECT INFORMATION |
|
INSTITUTION NAME |
Aberystwyth University |
ESTIMATED DURATION |
2h |
AGE OF KIDS ADRESSED |
11-16 |
MATERIALS |
For each student – arduino microcontroller, breadboard, LEDs (3-4), breadboard wires (10+), resistors, crocodile clip wires. Laptop with Arduino IDE. Printed versions of the worksheets from adafruit and arduino.cc |
TECHNOLOGY |
Arduinos, laptops, LEDs, cables as above. |
Nº OF STUDENTS |
20 |
Nº OF STUDENTS/TEACHER |
5 |
Nº OF STUDENTS/RESOURCE |
1 |
CODING ACTIVITY GOAL
|
– To relate a micro-controller (Arduino) with a physical circuit to a program
|
SPECIAL REQUIREMENTS |
||
Knowledge level |
Skills required |
|
Teacher |
Needs to know electrical circuits, arduino C (basic level: loops, setting up output pins), breadboard operation. Teacher can learn this by working through the worksheets linked below. |
— |
Student |
No assumptions |
— |
To take into account |
the more helpers the better |
|
PROJECT DESCRIPTION
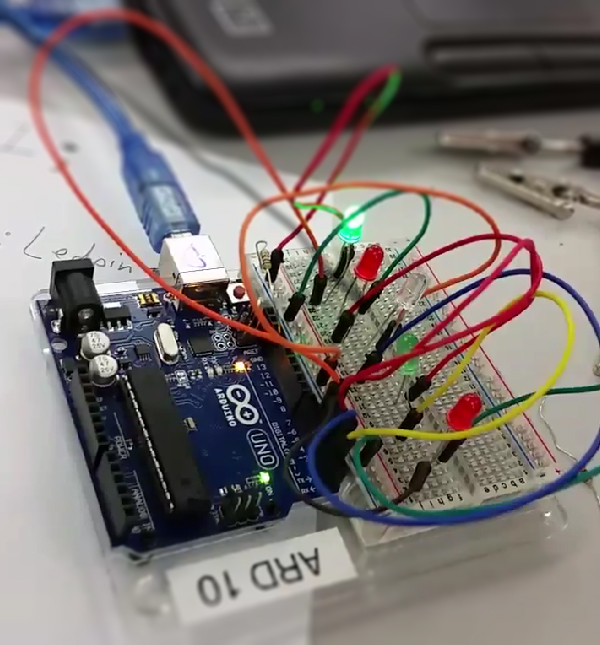
This project links together ideas from Electronics and Computing. We build a circuit, with an LED and a resistor, using an arduino microcontroller as a “battery”.
We then introduce more complexity to the point that kids have 3-4 LED lights controlled by a program, featuring a “for loop” which flashes the lights in turn.
STEPS TO FOLLOW TO CARRY OUT THE ACTIVITY
1. Set up your Arduino by attaching the programming cable to your computer.
2. Using crocodile clip wires, make a circuit from pin 13 on the Arduino, to an LED, to a resistor, then back to ground on the Arduino. In the Arduino IDE, open the “Blink” sketch from the samples programs. Click the tick to check the sketch, then load it onto the Arduino using the arrow button. The LED should blink. Discuss what is happening here: there is a circuit, which is controlled by a program. Edit the timing (delay) on the Arduino program to see what happens, and re-upload the program.
3. Change the setup so that instead of using crocodile wires, you use a breadboard. Breadboards make it easy to plug and remove components. This tutorial:
https://learn.adafruit.com/downloads/pdf/adafruit-arduino-lesson-2-leds.pdf is how to do this; follow that tutorial and you will learn all about breadboards.
4. One LED is all very well but let us now go to DISCO LIGHTS. Can you add one more LED to your breadboard? You will need to wire it in to a different pin on the Arduino when you are done. Now modify your code to make that LED flash too.
5. Add a third LED, and any more you have. Can you make them flash in turn?
6. If you put your LEDs on consecutive pins (e.g. 3, 4, 5, and 6) you can edit your program so that it does one each then moves onto the next using a for loop. Here is a tutorial showing how to do that https://www.arduino.cc/en/Tutorial/ForLoopIteration
FOTOS/VIDEOS OF THE ACTIVITY
LINKS RELATED TO THE PROJECT
https://www.arduino.cc/ The arduino project
https://learn.adafruit.com/category/learn-arduino Adafruit’s excellent Arduino tutorials
https://learn.adafruit.com/downloads/pdf/adafruit-arduino-lesson-2-leds.pdf LEDs from Adafruit
https://www.arduino.cc/en/Tutorial/ForLoopIteration For loops in Arduino

